
Here is all the code and a trained model
Eri Rubin also participated in this project.
This post is about understanding how a self driving deep learning network decides to steer the wheel.
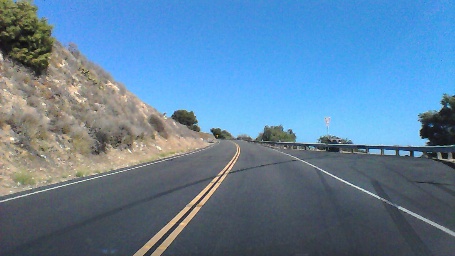
NVIDIA published a very interesting paper, that describes how a deep learning network can be trained to steer a wheel, given a 200x66 RGB image from the front of a car.
This repository shared a Tensorflow implementation of the network described in the paper, and (thankfully!) a dataset of image / steering angles collected from a human driving a car.
The dataset is quite small, and there are much larger datasets available like in the udacity challenge.
However it is great for quickly experimenting with these kind of networks, and visualizing when the network is overfitting is also interesting.
I ported the code to Keras, trained a (very over-fitting) network based on the NVIDIA paper, and made visualizations.
I think that if eventually this kind of a network will find use in a real world self driving car, being able to debug it and understand its output will be crucial.
Otherwise the first time the network decides to make a very wrong turn, critics will say that this is just a black box we don’t understand, and it should be replaced!
First attempt : Treating the network as a black box - occlusion maps
The first thing we will try, won’t require any knowledge about the network, and in fact we won’t peak inside the network, just look at the output.
We”l create an occlusion map for a given image, where we take many windows in the image, mask them out, run the network, and see how the regressed angle changed.
If the angle changed a lot - that window contains information that was important for the network decision.
We then can assign each window a score based on how the angle changed!
We need to take many windows, with different sizes - since we don’t know in advance the sizes of important features in the image.
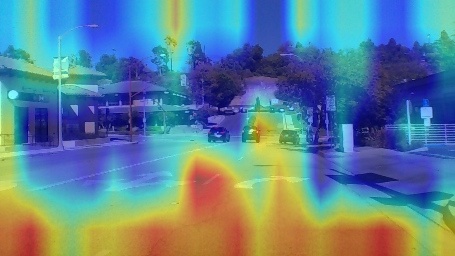
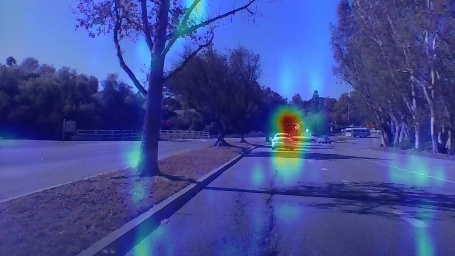
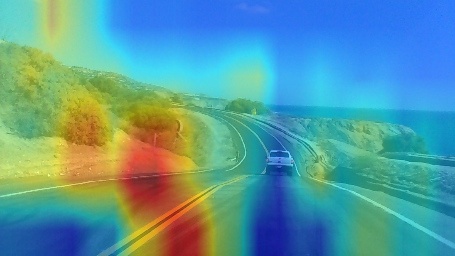
Now we can make nice effects like filtering the occlusion map, and displaying the focused area on top of a blurred image:
Some problems with this -
Its expensive to create the visualization since we need many sliding windows,
and it is possible that just masking out the windows created artificial features like sharp angles that were used by the network.
Also - this tells us which areas were important for the network, but it doesn’t give us any insight on why.
Can we do better?
Second attempt - peaking at the conv layers output features with hypercolumns
So we want to understand what kind of features the network saw in the image, and how it used them for its final decision.
Lets use a heuristic - take the outputs of the convolutional layers, resize them to the input image size, and aggregate them.
The collection of these outputs are called hypercolumns, and here is a good blog post about getting them with Keras.
One way of aggregating them is by just multiplying them - so pixels that had high activation in all layers will get a high score.
We will take the average output image from each layer, normalize it, and multiply these values from wanted layers.
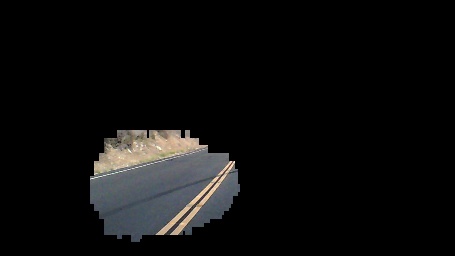
In the NVIDIA model, the output from the last convolutional layer is a 18x1 image.
If we peak only at that layer, we basically get a importance map for columns of the image:
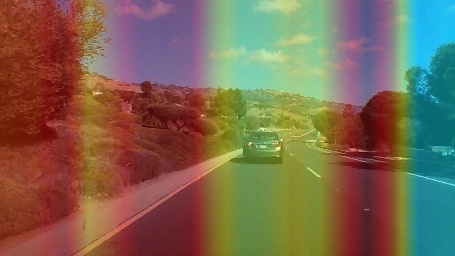
Anyway, this is quite naive and completely ignores the fully connected layers, and the fact that in certain situations some outputs are much more important than other outputs, but its a heuristic.
Here is a video with visualuzations done by both occlusion mapping and hypercolumns:Third attempt - Getting there - class activation maps using gradients
(The above image shows pixels that contribute to steering right)
Class activation maps are a technique to visualize the importance of image pixels to the final output of the network.
Basically you take the output of the last convolutional layer, you take a spatial average of that (global average pooling), and you feed that into a softmax for classification.
Now you can look at the softmax weights used to give a category score - large weights mean important features - and multiply them by the corresponding conv outputs.
Relative to the rest of the stuff we tried here - this technique is great. It gives us an insight of how exactly each pixel was used in the overall decision process.
However this technique requires a specific network architecture - conv layers + GAP, so existing networks with fully connected layers, like the nvidia model, can’t be used as is.
We could just train a new model with conv layers + GAP (I actually did that), however we really want the fully connected layers here. They enable the network to reason spatially about the image - If it finds interesting features in the left part of the image - perhaps that road is blocked?
This paper solves the issue, and generalizes class activation maps.
To get the importance of images in the conv outputs, you use back propagation - you take the gradient of the target output with respect to the pixels in conv output images.
Conv output images that are important for the final classification decision, will contain a lot of positive gradients. So to assign them an importance value - we can just take a spatial average of the gradients in each conv output image (global average pooling again).
I wrote some Keras code to try this out for classification networks.
So lets adapt this for the steering angle regression.
We can’t just always take gradient of the output, since now when the gradient is high, it isn’t contributing to a certain category like in the classification case, but instead to a positive steering angle. And maybe the actual steering angle was negative.
Lets look at the gradient of the regressed angle with respect to some pixel in some output image -
If the gradient is very positive, that means that the pixel contributes to enlarging the steering angle - steering right.
If the gradient is very negative, the pixel contributes to steering left.
If the gradient is very small, the pixel contributes to not steering at all.
We can divide the angles into ranges - if the actual output angle was large, we can peak at the image features that contributed to a positive steering angle, etc.
If the angle is small, we will just take the inverse of the steering angle as our target - since then pixels that contribute to small angles will get large gradients.
def grad_cam_loss(x, angle):
    if angle > 5.0 * scipy.pi / 180.0:
        return x
    elif angle < -5.0 * scipy.pi / 180.0:
        return -x
    else:
        return tf.inv(x) * np.sign(angle)
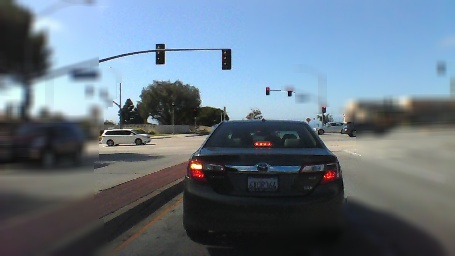
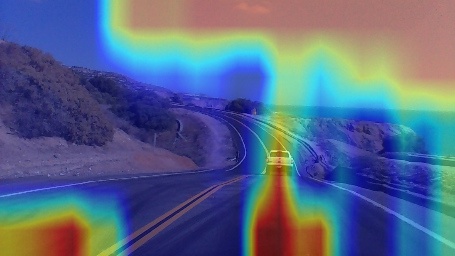
Lets look at an example.
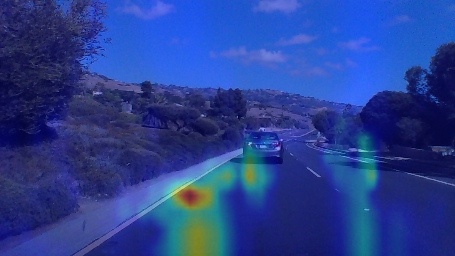
For the same image, we could target pixels that contribute to steering right:
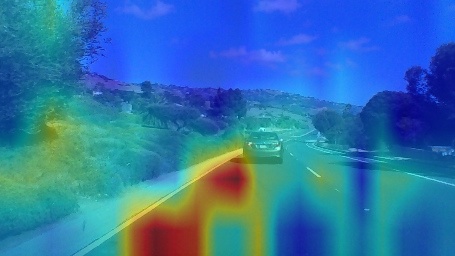
And we could also target pixels that contribute to steering to the center:
No comments:
Post a Comment